How to Make Product Mockups Without Photoshop
This post contains affiliate links; I may earn a commission at no extra cost to you.
AI disclosure: this guide was drafted with help from AI writing tools and reviewed and edited by PickSavvy Lab. Product details come from each vendor's sales page.
A flat ebook cover on a white background looks like a file. The same cover on a 3D book, slightly tilted with a soft shadow, looks like a product. That small shift is why sellers of ebooks, courses, printables, apps and physical goods use mockups everywhere: shop listings, sales pages, ads and social posts.
The good news: you don't need Photoshop, smart objects or layer masks. Below are three beginner-friendly methods, a checklist that separates convincing mockups from obviously fake ones, and the export settings that keep them sharp.
First, decide what kind of mockup you need
"Mockup" covers a few different things. Pick the one that matches your product:
- Digital product mockups — your cover or screen design placed on a 3D book, box, tablet, laptop or phone. Best for ebooks, courses, software and templates.
- Packaging mockups — your label on a bottle, tub, pouch or box. Useful before you've printed anything.
- Lifestyle or scene mockups — the product shown in context, like a printable on a desk or a mug on a kitchen counter.
- Bundle shots — several items grouped together to show "everything you get."
You'll usually want one clean "hero" mockup plus one or two lifestyle versions.
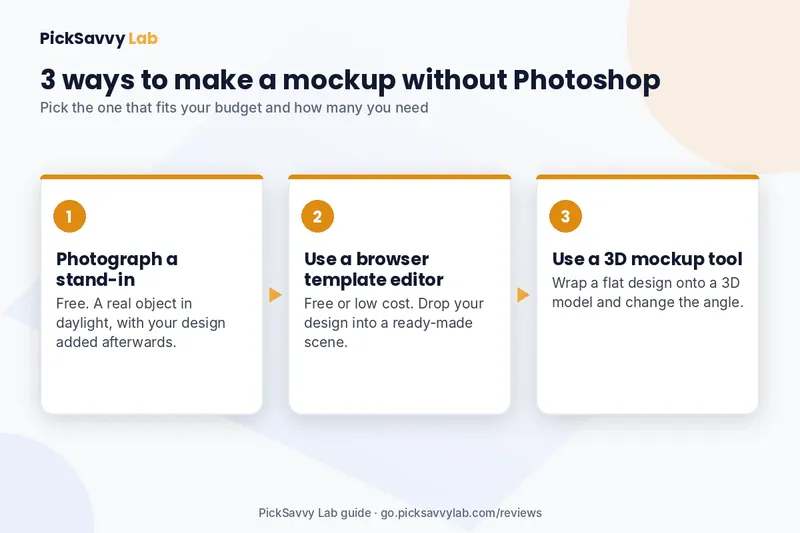
Method 1: Photograph a real stand-in (free)
If your product is printable or physical, the most realistic mockup is a photo.
- Print your design (or apply a sticker label to a plain jar or box).
- Shoot near a window with indirect daylight. Turn off overhead lights so colors don't mix.
- Use a plain surface: white card, light wood, a linen cloth.
- Shoot from a slight angle, roughly 30 to 45 degrees, rather than straight on.
- Take more shots than you need and pick the sharpest.
Best for: printables, stickers, cards, packaging tests. Weak spot: doesn't work for purely digital products like software or courses.
Method 2: Use a browser-based template editor (free or low cost)
Many online design editors include mockup templates where you drop your image into a placeholder and the tool handles perspective. The general workflow is the same everywhere:
- Export your flat design at a high resolution (more on that below).
- Pick a mockup template that matches your product shape and aspect ratio. A square design forced onto a tall book cover will stretch.
- Upload your design into the placeholder.
- Adjust the background and shadow to match where the image will be used.
- Export.
Best for: quick social posts and listing images. Weak spot: free template sets are often limited in angles and product types, and popular templates get reused by many sellers.
Method 3: Use a dedicated 3D mockup tool
3D mockup tools wrap your flat design around a 3D model, so you can rotate it, change the camera angle and adjust lighting. This is the closest you'll get to a studio render without learning 3D software.
Best for: digital products, box shots, software screens, consistent sets of images across a whole product line. Weak spot: usually paid, and you're limited to the models the tool includes.
The mockup quality checklist
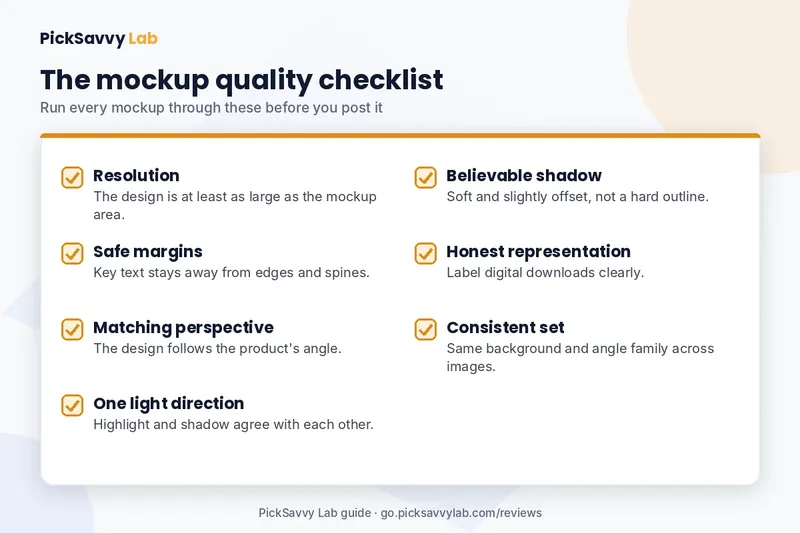
Whatever method you choose, run your result through these checks before you post it:
- [ ] Resolution: the flat design is at least as large as the mockup area. Upscaling a small image makes text fuzzy.
- [ ] Safe margins: important text isn't near the edges, where it can wrap around a spine or fall off a curved surface.
- [ ] Matching perspective: the design follows the product's angle. Flat text on a tilted object is the most common giveaway.
- [ ] One light direction: the highlight and shadow agree. If the light comes from the left, the shadow falls to the right.
- [ ] Believable shadow: soft, slightly offset, not a hard black outline.
- [ ] Honest representation: the mockup shows what the buyer actually gets. If it's a digital download, say so near the image so nobody expects a printed book.
- [ ] Consistent set: if you make several mockups, use the same background and angle family so your shop looks planned.
That "honest representation" point matters. Marketplaces and buyers both dislike surprises, and a clear "digital download" label next to a 3D book image avoids a lot of refund requests.
Export settings that keep mockups sharp
| Use | Format | Why |
|---|---|---|
| Transparent background (to place on a sales page) | PNG | Keeps transparency and crisp edges |
| Photos and lifestyle scenes on the web | JPG or WebP | Smaller files, faster pages |
| Print or client handoff | PDF or high-DPI PNG | Holds detail for print |
For print, 300 DPI at the final printed size is the common standard. For web, the pixel size matters more than DPI; export a little larger than the space it will fill so it stays sharp on high-resolution screens.
Where ClickDesigns X fits
If Method 3 sounds like what you need, ClickDesigns X is one browser-based option. It's a hosted point-and-click design editor with a 3D studio, so mockups and the flat designs that go into them live in the same place.
According to its sales page:
- A 3D Product Studio with 360° spin, tilt and zoom, plus lighting, blur, shadow and material finishes.
- 1-Click MagicWrap, which maps a flat design onto 3D models such as book and software covers, laptops, phones, supplement tubs and bottles.
- A Design Vault of done-for-you templates for covers, ads, social posts, lead magnets, thumbnails, flyers and business cards. The page describes these as "1000s" without an exact count.
- A drag-and-drop editor with layers, alignment, cropping and multi-page canvases, and imports for your own designs, PDFs, logos and photos.
- Exports as JPG, PNG, WebP or PDF, up to 300 DPI.
- It runs in the browser; the page lists macOS, Windows and Chrome.
That combination covers both sides of this guide: making the flat cover and then wrapping it into a mockup, without switching tools.
What's good, and what to weigh
Strengths, per the sales page
- No install and no design software skills needed.
- 3D mockups and box shots without separate 3D software.
- Commercial license, so you can use it for client work.
- Print-friendly exports up to 300 DPI.
- 30-day money-back guarantee.
Things to check first
- It's cloud-hosted, and the page doesn't say it works offline.
- The page says the one-time price can switch to a monthly subscription and mentions $67 and $97 a month as later prices, so check what you're actually signing up for at checkout.
- Upgrades are offered after checkout, and a separate bundle is sold.
- You're limited to the 3D models it includes; if your product is an unusual shape, check the sales page for something similar first.
Probably not for you if…
You already have a design tool and a mockup workflow you're happy with, you need to work offline, or you want a full photo editor or illustration app. And if you only need one mockup for one product, Method 1 or 2 may be all you need.
Price
As listed on the sales page when checked Nov 7, 2026: $39 one-time for the front end, shown as reduced from $67. Check the current price at checkout, which shows the final amount.
FAQ
What size should my flat design be before I make a mockup? As large as you can reasonably export. For an ebook cover, a common choice is around 1600 × 2560 pixels. Bigger source files give sharper mockups.
Are mockups misleading for digital products? Not if you're clear. A 3D book image is a widely understood way to show a digital product, as long as the listing says it's a download.
Can I use mockups for client work? That depends on the license of whatever tool or template you use. Look for an explicit commercial license.
PNG or JPG for my shop listing? JPG or WebP for full-scene images (smaller files). PNG when you need a transparent background or very crisp text.
Do I need 3D software for box shots? No. Template editors and 3D mockup tools handle the perspective for you.
Next step
To see the full feature list, limits and guarantee in one place, read our ClickDesigns X breakdown on PickSavvy Lab. For the other tools we cover, visit the PickSavvy Lab home page.
And if you're not buying anything today, try Method 1 this afternoon: one print, one window, ten photos. You'll learn more about angles and light than any template can teach.
Free: grab our Holiday Content Kit → https://picksavvylabdigitaltools.systeme.io/holiday-kit
Free: Holiday Content Kit (email required, not an affiliate link)
Affiliate disclosure & privacy policy · About · Free Holiday Content Kit